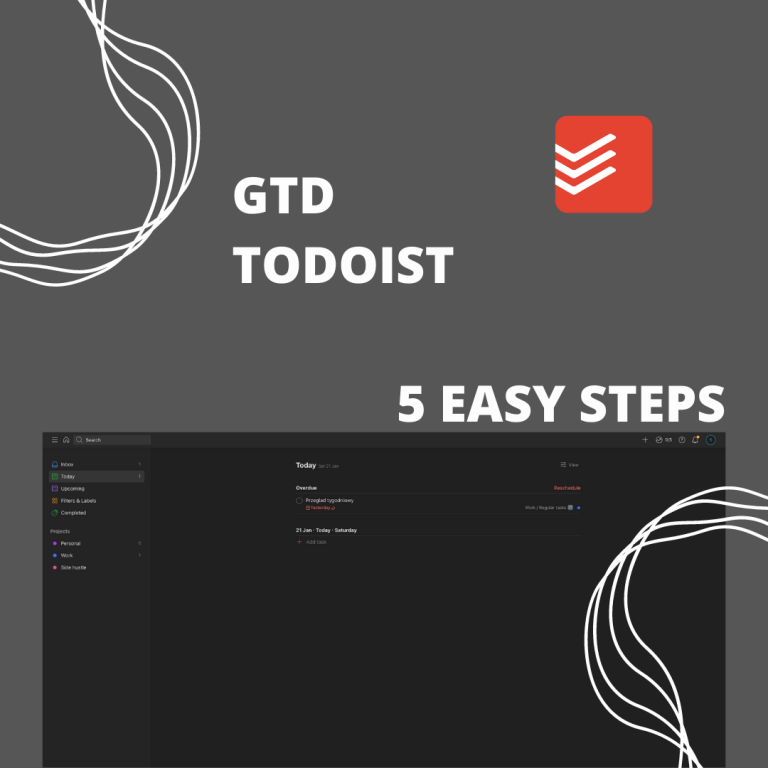
Welcome! We’re glad you’ve decided to take the first step toward boosting your productivity. If you’re feeling overwhelmed and unproductive, the Getting Things Done (GTD) method might be just what you need. Whether you’re a student, professional, or entrepreneur, Todoist is the perfect tool to help you stay organized and on track. GTD Todoist Setup consists of everything you need to get begun!
Introduction to GTD Todoist setup
Getting Things Done (GTD) is a popular productivity method that is designed to help people manage their time and tasks more effectively. The GTD method is based on the idea of capturing, processing, organizing, reviewing, and doing tasks in order to achieve your goals.
One of the most effective tools that you can use to implement the GTD method is Todoist. Todoist is a powerful task management app that is perfect for people who want to boost their productivity and get things done. In this guide, we will show you how to set up Todoist for GTD and how to use it to achieve your goals. With Todoist, you can streamline your task management and turn chaos into control. So, let’s get started!
Step 1: Capture
Capture refers to the process of collecting and recording all the tasks, ideas, and commitments that you need to do or want to do. This is the first step in the GTD Todoist Setup workflow, and it’s designed to help you clear your mind of distractions and focus on what’s important. The goal of capture is to create a complete and up-to-date inventory of everything that you need to do, so that you can review it later and decide on the next steps. The idea is to have a central place where you can put everything that is on your mind, so that you can process it later, and not have to worry about forgetting it.
Setting up Todoist to capture all tasks and ideas
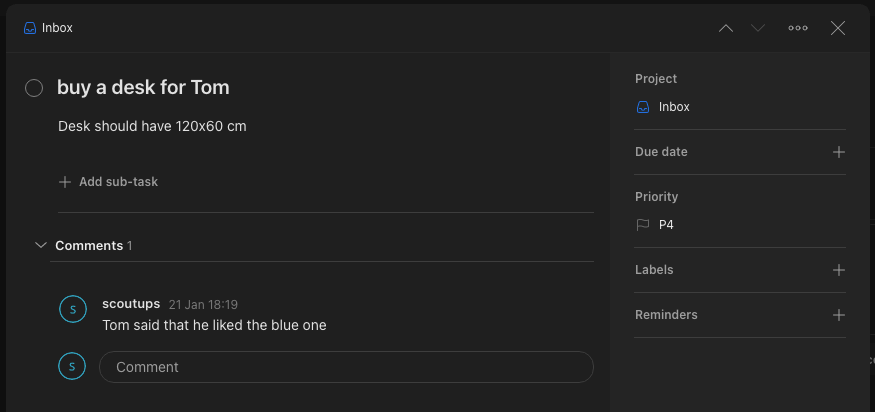
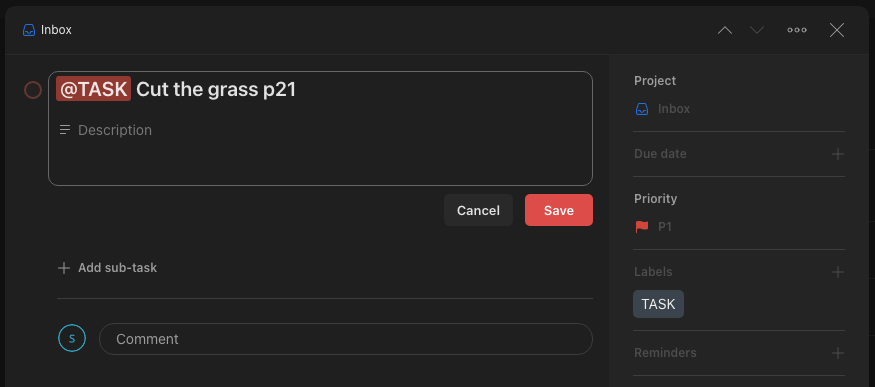
Todoist provides the perfect Inbox that will let you throw out there all the things you need to get done. You’ll find it in the side menu at the very top. Write down here everything that comes to your mind Inbox will take it all!
Remember to include in the task all the necessary information for its implementation. It is very important to name the task so that it is meaningful. If you need to write more information, you can do it with a description and you can add comments to the task.
Step 2: Clarify
Clarify refers to the step of processing the items that you’ve captured in the previous step. The goal of this step is to determine the action that needs to be taken and to decide on the next steps. During the process step, you’ll review each item on your list and decide what to do with it. You’ll need to decide:
- If the task is actionable
- If it take less than 2 minutes
- If you should delegate it
- If it is project
- If you should defer it to the calendar or next action step
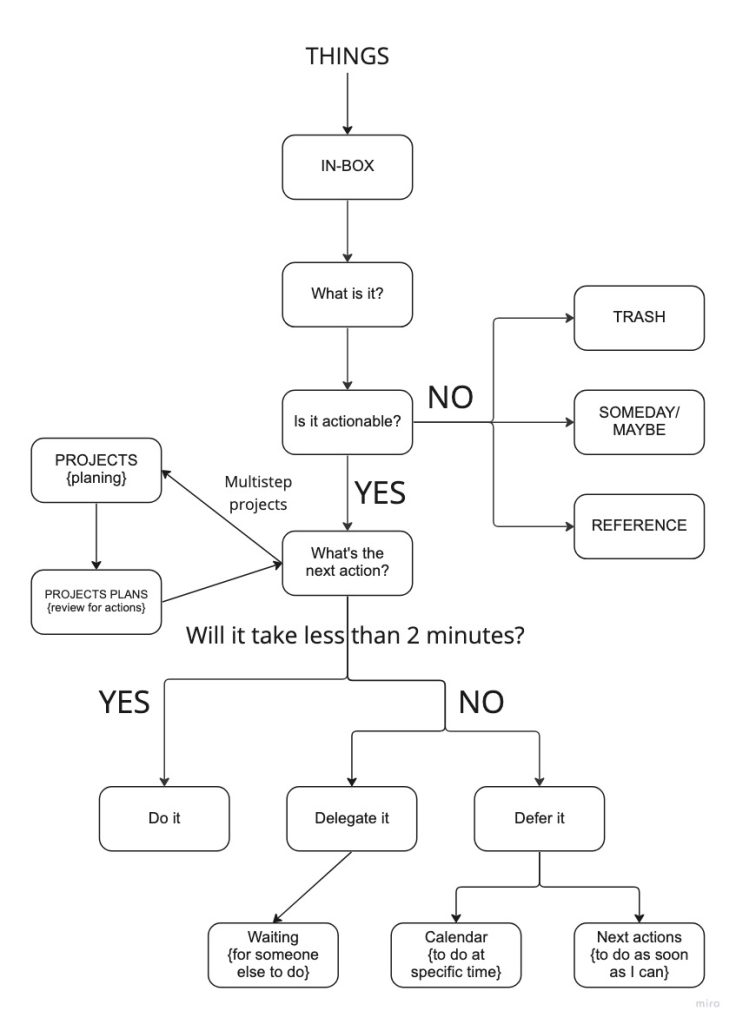
It’s important to process your tasks regularly so that you can ensure that your inventory is up-to-date, and you’re aware of everything that needs to be done.
Using labels and priority in Todoist to Clarify
In Todoist, a label is a way to categorize tasks by adding a tag to them. This allows you to group and organize tasks by topic, or any other criteria that you choose. Labels can be created and assigned to tasks. The priority feature allows you to assign a level of importance to a task, from less important – 4 to most important – 1.
To add labels go to the sidebar and next “Filters & Labels”. Next to the word “Label” you will find a button for adding new labels. You can give them a name and assign a color.
Here is GTD Todoist Setup proposition of the label to start with:
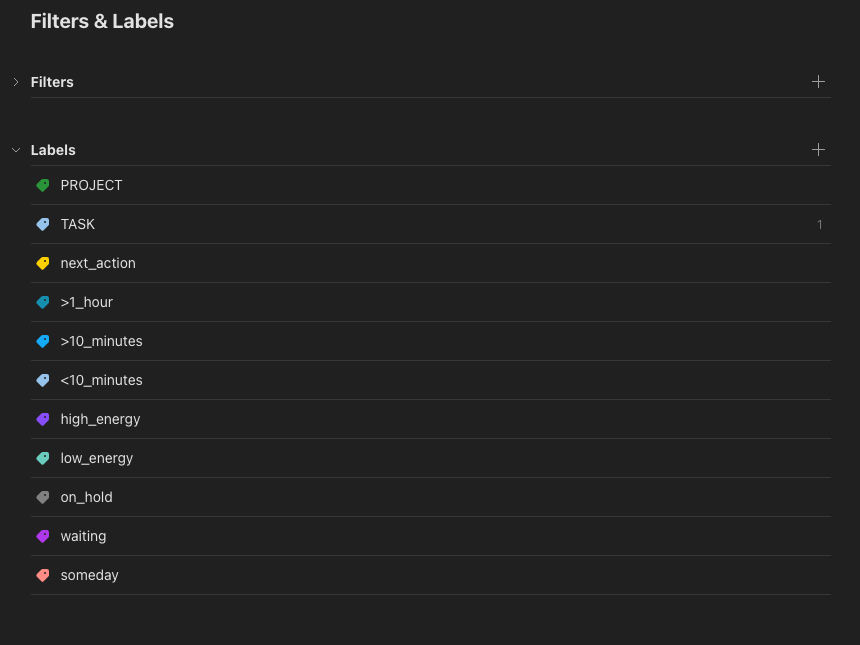
- PROJECT – for projects
- TASK – for simple tasks
- next_action – the next action you need to take to push the task further
- >1_hour, >10_minutes, <10_minutes – categorize by how much time you need
- high_energy, low_energy – categorizing by how much energy you need
- on_hold – for blocked or withheld tasks
- waiting – for delegated tasks
- someday – for things you don’t want to do now
Adding labels and priority to task
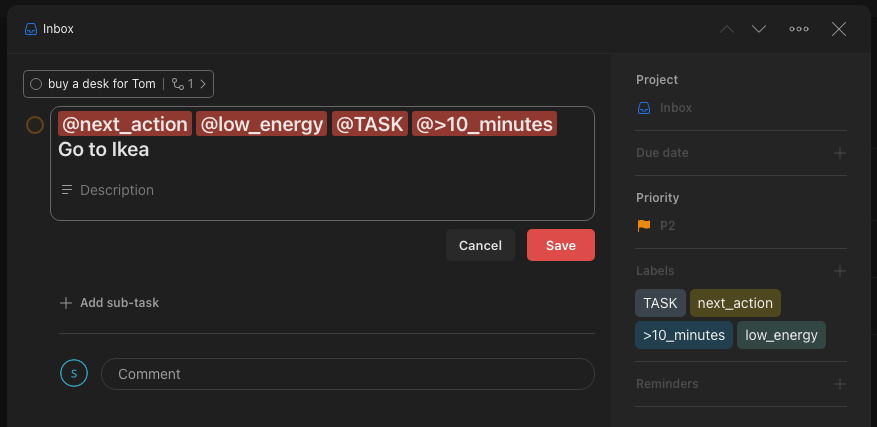
Set labels and priority by clicking on the corresponding icon on the right in the task view or by writing @ for labels and p1 for priority in the task field.
Deciding on the next actions of project
GTD recommended creating the next action as soon as possible to know what you need to do. If the task is small enough and requires only one action then just mark it with the label “next_action“. If you know that the task will require multiple steps to complete then such a task becomes a project.
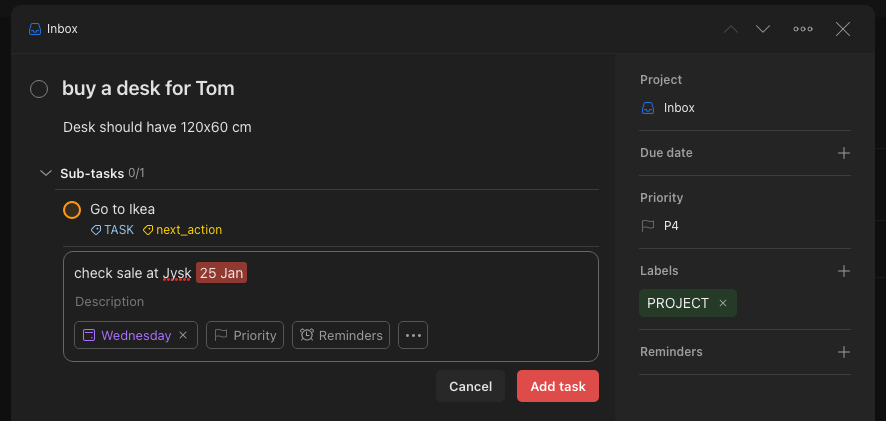
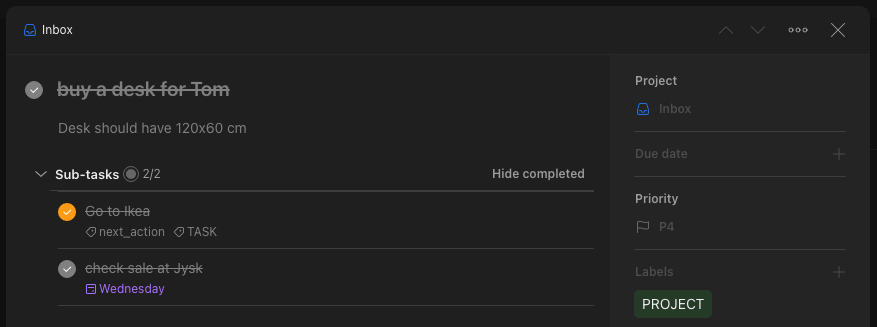
The project needs to be broken down into specific steps that need to be taken to complete the topic. For this, we will use subtasks in Todoist. Tasks can have multiple subtasks, but subtasks can also be broken down into smaller subtasks. To create subtasks enter the task view, in the main section you will have a button “add subtask”. Don’t forget to tag “next_action” to exactly know what you should do next!
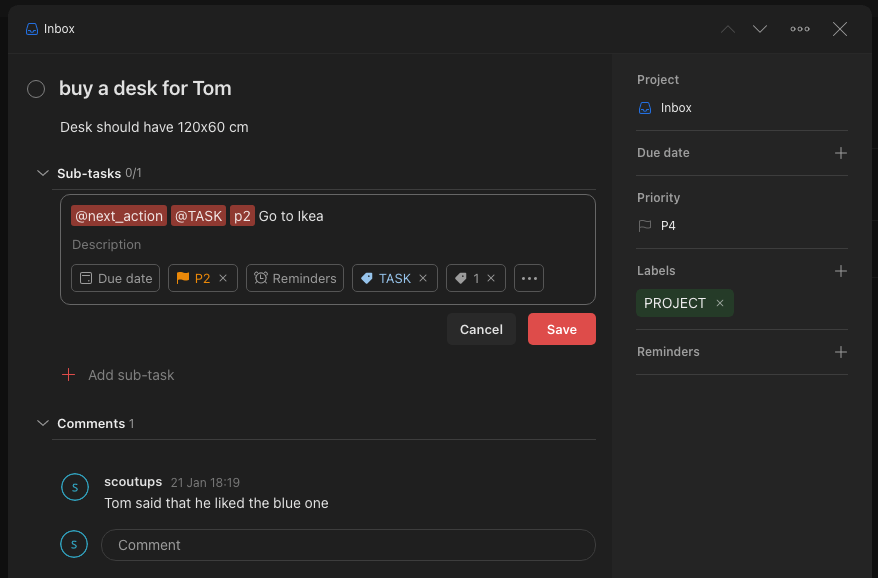
When determining the next action, it is worth adding labels related to the energy and time we need for this task to be performed. After such an action we will have a perfectly defined task to complete!
Due date (deadline)
Another Todoist feature that is extra is setting a date that can define an event or deadline. You can add a due date by typing the date in the task name or through a button on the side in the task view.
So easy and so many benefits
Once you clarify add the corresponding labels and priority to the task. You will have a better overview of what expects you in that task. By categorizing, you will also be able to more accurately select tasks that better fit your condition and time disposition.
Super! Step clarify is practically behind you! Of course, in this step, you should remove tasks that no longer interest you or move them to your references repository. In the next step, we will deal with placing tasks in the right place.
Step 3: Organize
During the organizing step, you’ll put your tasks into the appropriate category, such as work, personal, or side hustle. The goal of this step is to put all of your tasks and projects into a logical and easy-to-manage system so that you can easily find and access the information that you need. Grouping tasks by context give you a powerful overview.
But, how to understand the context? Context is simply the category, tool, thing, place or person you need to do something.
- If it is related to your work or it is personal
- If you should do it on a computer or on phone
- If it take 5 minutes or 1 hour
- if you need clear mint or it is a simple task
- and much more…
By organizing your tasks and projects, you can easily see what needs to be done, when it needs to be done, and what the next action is, this way you can stay on track and achieve your goals.
GTD project vs Todoist’s project
Getting things done defines a project as a thing that needs multiple steps to complete. Todoist’s projects are a much more elaborate tool in which we can add tasks and divide them into sections. In GTD Todoist Setup approach, I advise using Todoist’s projects as containers in which to set the context.
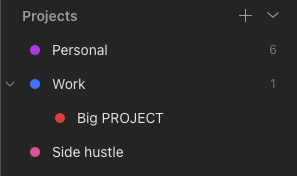
Most of the projects we will be involved in will be relatively low-complexity around 10 subtasks. Such projects do not need a separate structure in our system. It is different from projects that will last for months and will consist of hundreds of tasks and subtasks. For such large projects, it is suggested to create a separate Todoist project and keep it in a nested structure as shown in the picture below.
Categorizing tasks by context
Now we have moved on to the stage of categorizing our tasks in order to put them in a place from which it will be easiest for us to manage them. As a starter, I propose to divide Todoist projects in such a way that we have the best possible division of tasks according to the different spheres of our life. Of course, this is an example and I encourage you to personalize it according to your requirements.
GTD Todoist Setup proposes to have three main projects:
- Personal – for personal business, home, family, bills
- Work – for work-related matters
- Side hustle – related to your hobby
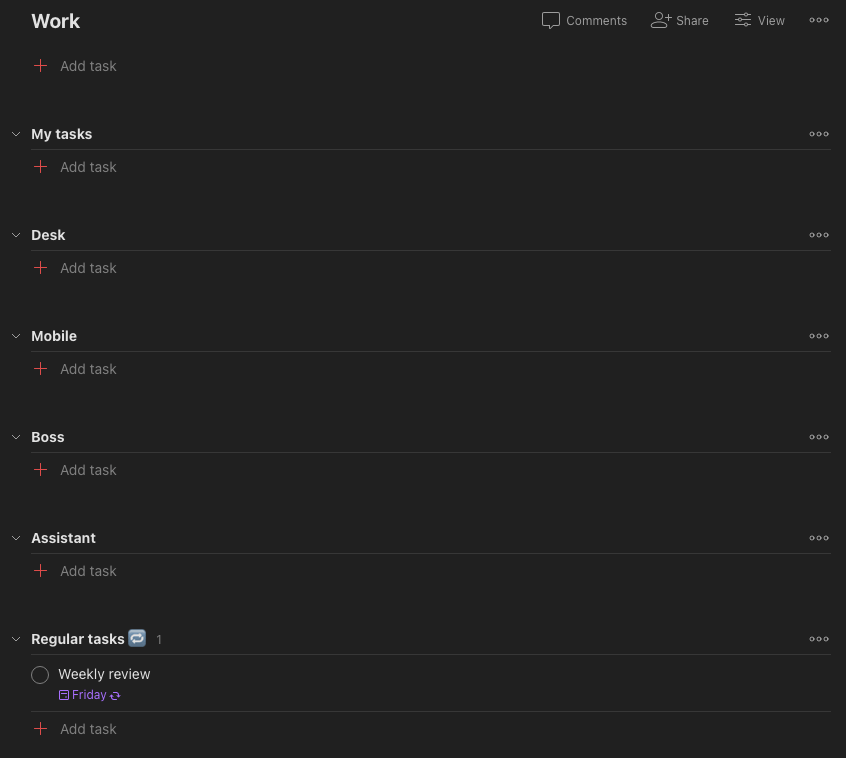
Additionally, we divide the project into sections. Sections are intended to further fragment the context in which the area of life will be affected. Of course, this is also GTD Todoist Setup suggestion, and I encourage you to personalize it according to your requirements. To add a section, point the mouse behind the last section or between sections until a red button appears.
Move task to the project
The final step in analyzing the Inbox will be to move the task to the appropriate project and section. Do it according to your own preference, as you think where it fit best. The task should be in a place where you can easily find it in the future.
Moving tasks to a project can be done in two ways. The first would be to set it in the task view in the upper right corner under the heading “Project”. Select the appropriate option from the drop-down list.
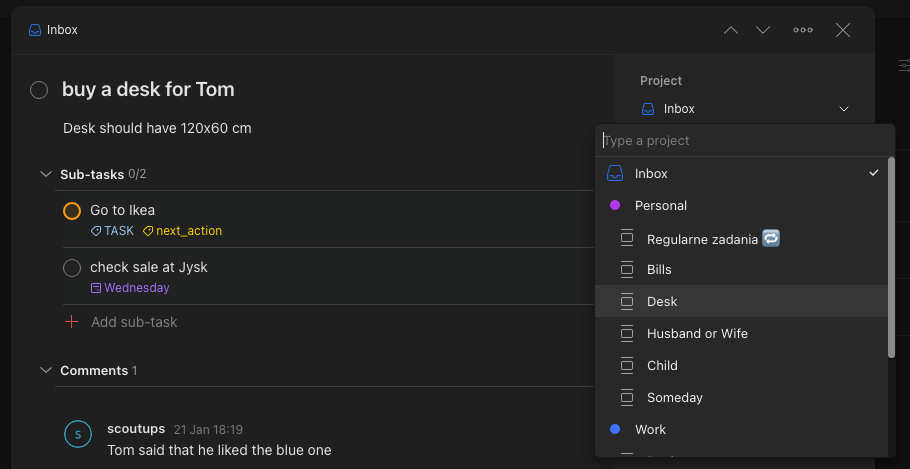
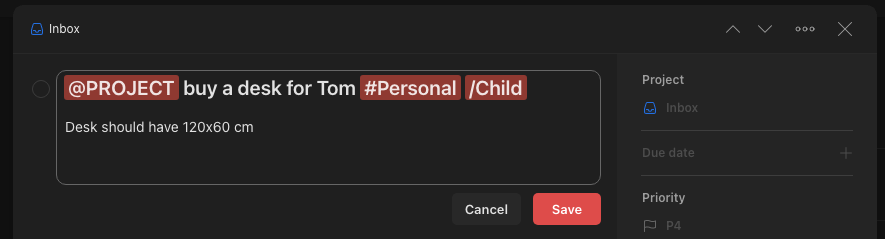
The second option to assign a task to a project is to type in the task field # followed by the name of the project, and if you want to assign it to a specific section, add / and the name of the section.
Step 4: Just DO it!
This step is about taking action on the tasks and projects that you’ve identified and organized during the Organize phase. This is the final step in the GTD workflow, and it’s the most important one because it’s where you actually get things done!
When you have completed GTD Todoist Setup, you can now choose the appropriate task for your current opportunity. You can choose the task according to how much time you have and what tool is available at hand. It is important to spend time and energy on the right activities. Now you can enjoy your completed tasks!
Execute and complete tasks on Todoist
When you have everything ready you can start doing tasks. Once done, mark the task as done in Todoist. In case of projects, mark the sub-tasks as done and when you have done all of them, also mark the project as done. Nothing easier!
Using filter is game changer
In selecting tasks to do under the right circumstances, filters can be useful to you. They will allow you to filter tasks according to your conditions! Filtering options include by title, date, priority, labels, projects and much more! If you want to know more about it, I refer you to the official documentation.
Maximizing productivity by integrating Todoist with additional tools
To make your productivity with GTD Todoist Setup even greater use integrations. They will allow you to achieve even more in less time! Here are GTD Todoist Setup two recommendations:
- Todoist Chrome extension – quick access to Todoist in your browser
- Todoist for Gmail – move emails to your inbox so you can deal with it later
If you want to learn more about integrations take a look at this link.
Step 5: Review
Review is the most important point in GTD Todoist Setup, it refers to the step of regularly checking in on your tasks, projects, and goals to ensure that everything is on track and that you are making progress. The goal of this step is to check that your system is up-to-date and that you are aware of everything that needs to be done. You’ll also check that your next actions are clear and that you have a plan for everything that you need to do. Additionally, you can use this step to reflect on your progress and adjust your goals and plans accordingly.
The Getting Things Done review step can be done daily, weekly, or monthly, depending on your preference, Todoist offers ways to track progress, set reminders, and review tasks and projects. This step is important as it allows you to make sure that you are not missing anything and that you are on track to achieve your goals.
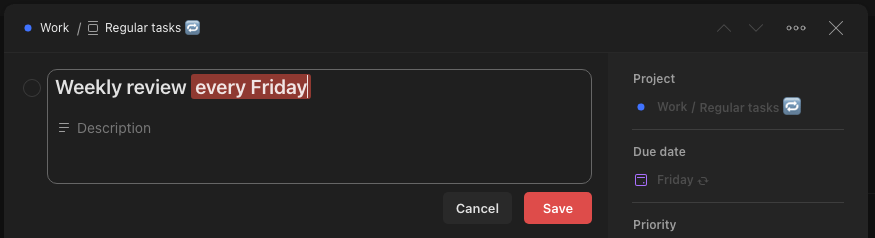
Use a recurring due date in Todoist
To make sure you don’t forget about your reviews, GTD Todoist Setup recommends creating a task that will remind you of this. Todoist has a recurring due date feature that will allow you to create a task that will renew every specified period of time with no extra effort required on your part. The best would be weekly reviews! To add a recurring task type “every” before the date.
Using Todoist’s notifications and reminders to stay on track
A useful feature that will allow you to complete the task on time are reminders. You can get a reminder for a task whenever you want. You can do it in two ways: you can set a reminder for every task that has a date, e.g. 30 minutes before. You can also set a notification for each task, which will be whenever you set it. To learn more about it, follow this link.
On the end
Don’t make excuses, GTD Todoist Setup will help you manage your tasks. But it’s up to you how many of them you make! Maybe you don’t like Todoist check how does it in Notion? Good luck enjoy your work!